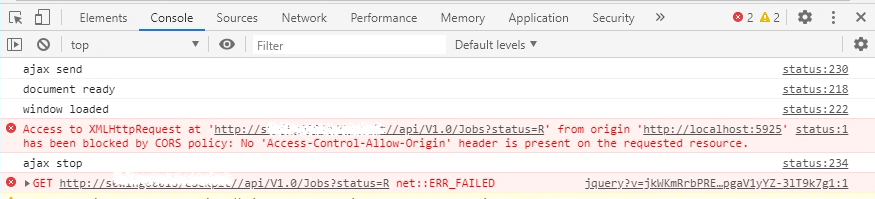
Installed macOS Catalina on my MacBook Early 2009

I still have my Early 2009 MacBook for my kids. It runs El Capitan and Windows 10 (bootcamp). Installation of macOS Catalina on my macbook 5,2 is unsupported. With the Catalina patcher from DosDude1 the installer can be tricked to allow installation.

Keep in mind that the software will be patched and the hardware remains the same. Catalina has features (continuity, handoff) that rely on certain hardware and will not be available. For Catalina to work I’ll need to patch the BootROM to enable booting from an APFS formatted disk – do this first!

After 2 hours my old MacBook showed the apple logo on a grey background. The progress bar hadn’t moved for some time, so I rebooted the machine. Turns out this is a bug reported on github (see references) and rebooting is the workaround 😉 I was greeted with the wizard to configure macOS Catalina and login to my iCloud.

macOS Catalina on macbook 5,2

The custom intel SSD supports TRIM. I enabled the TRIM support by running the following command and confirming the change:

sudo trimforce enabled

I noticed that the reboot took a long time. Also the next boot was slow. I booted from the Catalina patcher USB stick and applied the patches manually. Just before the reboot I enabled the checkbox Force Cache Rebuild.

force cache rebuild option in Post-install patches screen

Boot times are back to normal. I’ve only installed Daisydisk and Microsoft Team and both work fine.

Maybe upgrading the memory next time …

References

Posted in Uncategorized | Tagged , | 2 Comments

Working keyboard only

I’ve tried working keyboard only (no mouse) for two weeks and learned to live with shortcuts. Here are my tips-and-tricks.

my keyboard with shortcuts on Post-it notes

Just do it

Put your mouse out of reach. Disconnect it. Turn it off. Just do it.
You’ll feel helpless for a minute or two and then you start to learn how to do it.

Tools

My main computer is a MacBook. The tools listed below work on Apple machines.
Alfred helps me start my apps and automate a lot of steps. I added a script to connect to my AirPods with a command.
On my main monitor I remote desktop “full screen” into my work computer. With Amethyst I can switch the mouse focus between my two monitors. Only with the mouse focus on the right place I can use my keyboard for input …
Every application I use has different shortcuts. CheatSheet displays the shortcuts for the active app by long pressing ⌘

My company runs Windows machines. Sometimes Windows and MacOs have the same shortcuts. I run Autohotkey on Windows startup to blok Windows acting on ⌘+space (alfred) and ⌘+ctrl+c (Windows Color filter)

Other

I have an awesome Logitech K800 that has a dedicated key to toggle the mouse context menu. Sometime the context menu is easier than the shortcut.
Found this Post-it template so I can print my most used shortcuts on stickies. Download my shortcut post-it as pdf.
I Learned that navigating a webpage is easiest when searching for the text of the link and than hist ESC to see the link being selected. Now I can open the link with ENTER.

Image courtesy of ratch0013 / FreeDigitalPhotos.net
My journey continues. I’am not 100% mouse free, more like 95%. To setup the tools (alfred and amethyst) the mouse is needed – only once. Some websites and apps only work with use of the mouse (you know who you are)

Posted in Uncategorized | Leave a comment

Upgraded Windows 7 to 10 on my MacBook Early 2009

I still have my Early 2009 MacBook for my kids. It runs El Capitan and Windows 7 (bootcamp). Since the support for Windows 7 ended on January 14 2020 an upgrade was needed. Unfortunately the bootcamp 3 that comes with El Capitan doesn’t support any version higher.


Image from The Verge

A quick search on internet learned that upgrading Windows 7 to Windows 10 was easy. Just download the Media Creation Tool and download the bootcamp 4 zip for the updated drivers.

After 3 hours my old MacBook was running Windows 10 with the correct drivers. In the references all downloads are linked. The youtube link makes it dummy proof.
Maybe upgrading to macOS Catalina next time …

References

Posted in Uncategorized | Tagged , , , | Leave a comment

Bogus – testdata generator


Photo by Steve Harvey on Unsplash

https://www.nuget.org/packages/bogus

Creating testdata is not my favourite task. With bogus I can define the rules the data must adhere and generate as much data as I need.

The rules are setup with fluent syntax and reminds me of AutoMapper configuration. When you set the Randomizer the data can be generated inside your testcode and produce the same ‘random’ set of data every time.

Bogus.Randomizer.Seed = new Random(12345678);
Posted in Development, Tooling | Tagged , , , | Leave a comment

EF core: entity cannot be tracked

We use EF core to store a bulk of data with an auto-number primary key. The auto-number is an Identity column in Sql Server. When inserting a large amount of records with related children we encounter this error:

System.InvalidOperationException entity cannot be tracked because another instance with the same key value is already being tracked

The github bug that described the same bug: Adding multiple new entities at the same time results in System.InvalidOperationException entity cannot be tracked because another instance with the same key value is already being tracked #13937 The same message, but explicit no use of identity. This got us thinking.

Digging a little deeper we discovered that the TemporaryIntValueGenerator used in EF core used int.minvalue + 1000. That is the first temporary Id used in EF core to track newly created records with an Identity column. Our exception occurs with a large amount of record, maybe 1000? Would the identity value generated in Sql already be used as a temporary value? The identity columns we use start at -2147483648 (int.minvalue) and increase by 1.

We implemented our own TemporaryNumberValueGenerator that start with 214748364 (int.maxvalue / 10) and use that in the OnModelCreating override:

protected override void OnModelCreating(ModelBuilder m) {
   base.OnModelCreating(m);
   m.Entity<MY_TYPE>()
    .Property(x => x.Id)
    .HasValueGenerator<TemporaryIntValueGeneratorMaxValue>();
}
Posted in Development, Tooling | Tagged , , , | Leave a comment