
My Synology NAS allows the use of SSL to encrypt traffic. The default certificate supplied works, but gives an exception in the browser: There is a problem with this websites security certificate. The problem is the address and the certificate don’t add up. So the solution is to setup your own domain, link it to your NAS and create a certificate for it.
Other parts
Create your SSL certificate
Finally the point of all this work. The SSL certificate for your own domain and access to the NAS. For this I use startssl which is free ![]()
UPDATE 21 March 2017: don’t use startssl anymore
- Head over to startssl and goto Control Panel. Start the Express lane or Authenticate when you’ve already signed up.
- The Express lane guides you through the signup process and starts the Validations Wizard. When you authenticated/signed in you can start the Validations Wizard now.
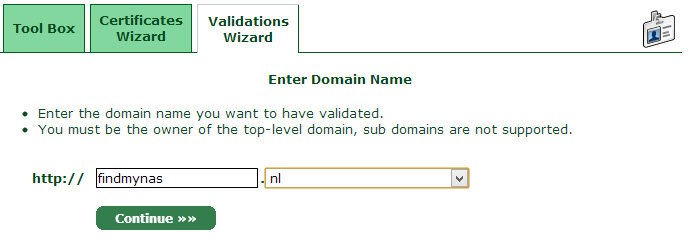
- Choose Domain Name Validation and continue

- Enter the domain name (findmynas.nl) and continue

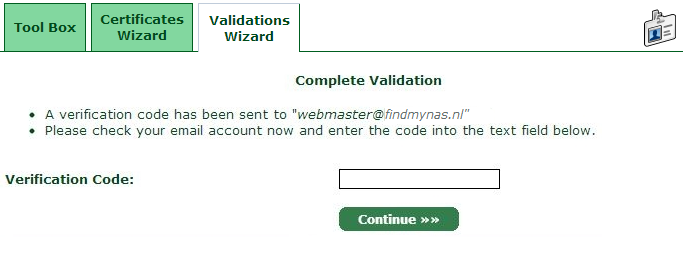
- Select the e-mail address to use for verification and continue. This is why I always have a catch-all e-mail (* for namecheap).

- Copy-and-Past the verification code from the e-mail into the field and continue

Now the domain is verified and the SSL can be generated.
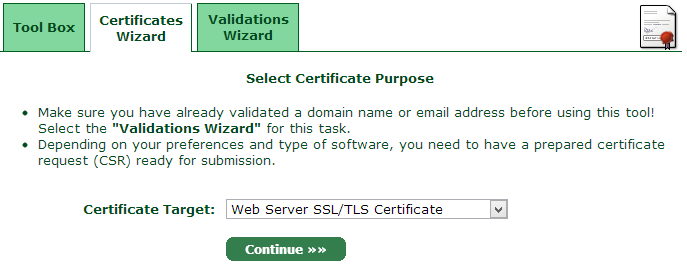
- Start the Certificates Wizard. Choose Web Server SSL/TLS certificate and continue

- Enter and confirm a Password, leave the keysize and algorithm to the defaults and continue

- Now you need to save the encrypted private key by Copy-and-Past to a plain text file.

Since I’m doing this from a MacBook I execute the openssl rsa -in ssl.key -out ssl.key command in terminal. There is a tool in the Tool Box that can do this for you online.
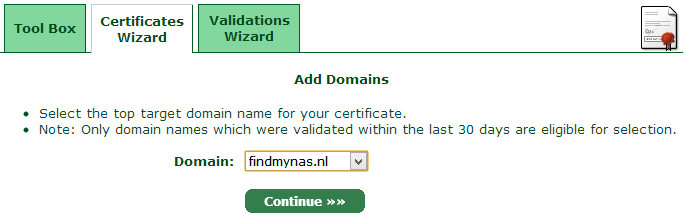
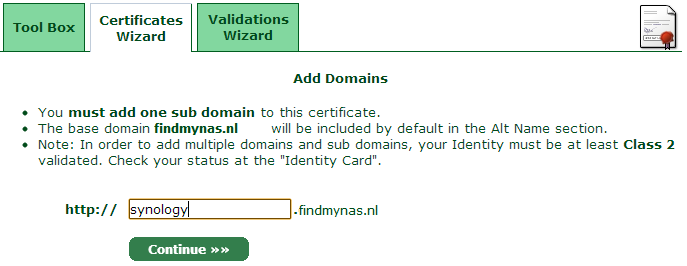
- Select your domain (findmynas.nl) and continue

- Enter the subdomain setup for DDNS and continue

- Confirm your choices on the next step and continue
- Now you need to save the encrypted certificate by Copy-and-Past into a plain text file.

Also save the intermediate and root CA certificates: the bolt texts in the wizard are links to the files you need.
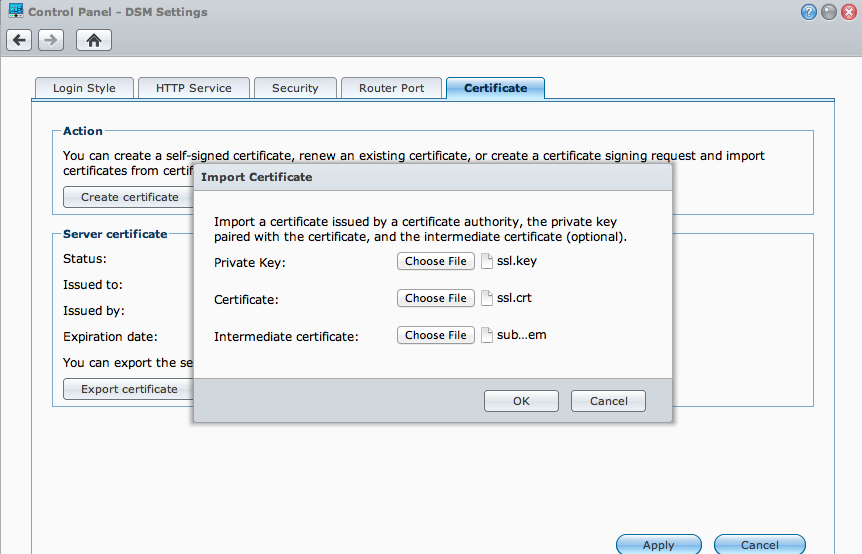
- Now login to your NAS and goto Control Panel > DSM Settings tab Certificate and choose Import certificate. Select the files you’ve created above.

- Add the root CA certificate to your keychain/certificate store by double clicking and importing it to Trusted Root Certification Authorities.


Now you can access your synology NAS over the internet without the certificate Error.
Note that the used domain FINDMYNAS.NL is not mine and only used for demo purposes because it was available at the time I created this post.

Pingback: Resolve certificate error for Synology Diskstation part 1 of 4 | Erictummers's Blog
Pingback: Resolve certificate error for Synology Diskstation part 2 of 4 | Erictummers's Blog
Pingback: Resolve certificate error for Synology Diskstation part 4 of 4 | Erictummers's Blog
Hi, I am trying to follow your guide and things are going well but I have a question – what is the purpose of decrypting your private key? Do you need it to be decrypted before uploading to the server?
Hi David, nice to hear you’re setting up ssl using my post.
In step 8. you specify the password for encrypted storing your private key in ASCII format. To use the private key you need to decrypt it with that password. Then you can setup ssl with the decrypted key. Securely dispose the decrypted key after use.
The private key is used to proof your NAS sent the information and not a malicious person. To prevent this ‘identity theft’, is why the private key is stored encrypted with a password.
Thanks for your help. I think I might out of luck because I somehow incorrectly saved my encrypted private certificate so when I try to load it to decrypt (I have the key), it says it can’t load. I tried passing it through a validator to see what might be wrong (extra white space or hidden CR?) but I can’t seem to figure it out. It seems like it’ll cost about $25 to revoke it and I cannot generate another cert without paying. Any advice?
Hi David, today I renewed my certificate (= created a new) No problem creating another certificate for my domain.
The validation of the domain (step 3-6) seems to be valid for 30 days. Maybe after that period you can start over without paying.
Also be sure to past the certificate in a plain text file. In Mac OS X you can achieve this with TextEdit, make sure to use Format > Make Plain Text. What OS are you on?
Pingback: Renew certificate | .NET Development by Eric
Pingback: Best Off .NET development by Eric | .NET Development by Eric
I don’t know if you are reading comments on this blog post, but any advice on how to do this would be appreciated.
I have registered my domain via Google, used Namecheap to set up the domain and subdomain and get verified, etc. for synology.[mydomain].com, created my various certs and keys and downloaded them etc…
but for the life of me I can not get my local browser to recognize the subdomain name with https….it just has errors on loading the page. I use Chrome to navigate to the local IP address for my synology, and it just shows that https is not valid but still lets me browse to the drive’s interface once I accept the risk.
Any other help or pointers would be appreciated. I don’t care so much about internet access, but want to get rid of that https error for loca browser access.
Have you imported the Root CA Certificate on the machine you browse with? Windows needs it to trust the certificate.
I’m using OS X El Capitan and StartCom root CA certificate is installed by default.
I have imported various certs…Keychain access is not intuitive. 😦 Now I am checking Windows 7 in BootCamp…still gets the same error as described below.
At any rate, I think it’s a DNS issue maybe?
When I type in synology.mydomain.com, it comes back as: The server at rrpersonal.com can’t be found, because the DNS lookup failed.
I have the domain registered via Google, and just checked namecheap.com for my set up.
I have an entry in both Host Records and Dynamic DNS set up the same it seems:
A+ Dynamic DNS,
Host: synology
Value: 127.0.0.1
TTL: automatic
Any insight from these data?
My namecheap freedns only has A Record. Changing this can take some time before effective, be patient.
type: A Record
host: synology
value: 84.18.217.99 (ip-address I have from ISP)
TTL: automatic
Oh and my real goal was just to get rid of the damned SSL error when I browse to the NAS via an internet browser (such as Chome)….I think I am fine with using the synology built in connection service to access via the internet…
But the first time each browsing session that I enter https://192.168.1.7:5001/webman/index.cgi as the addess, I get the https struckthrough, and the error about possibly being an unsafe site. 😦 I have to set an exception in the browser screen to say go ahead I accept the risk.
192.168.1.7 will not be the server name you registered the certificate for. In my case I have to use https://synology.findmynass.nl:5001 even for internal use. Only then I don’t get the error you describe. You cannot use the ip-address.
Maybe it has something to do with my DDNS Updated 2 configuration? What app do you use on your Synology to update your DNS to your IP?
I’m using DDNS updater (not version 2) from http://update.10trum.de/packageupdate/getpackages.php
Yay, it works for now. I used Namcheap’s DNS tool while I was in Window 7 and I guess that pushed through. But now I am back in El Captian, so I have to check the DDNS app on the synology to see if it is connecting to update the DDNS…wish me luck!
OK, one more question, since you’ve been so great. 🙂
What are the configuration entries to make in DDNS updater? Some are clear, I think…others not so much.
http://prntscr.com/9q8hvq
Wildcard: [] use wildcard
Static: []has a static IP address
Custom: []is a ‘custom’ top-level domain
Login:
Password:
Confirm Password:
MX Hostname:
MX Priority:
1-999
Backup MX: [] is backup MX for the domain
You should use ‘synology’ for the hostname and ‘rrpersonal.com’ for the login. Leave all options unchecked and clear, except for the password + confirm password.
Great! Thanks man. I got the DDNS updater working now and it seems to be great!
I really appreciate the guide, although I came late to the party after some of the services’ interafaces changed…I still got!
Pingback: Renew certificate 2017 edition | .NET Development by Eric