
We are migrating from TFS2017 to Azure Devops Server. Everything seems to work after the test migration – except for running selenium tests. The old method with the test agent installation has been deprecated. Microsoft expects us to register an (release/build) agent that can run the selenium tests. Here is how we got it working.
Register an agent
First we need to register an agent for running the selenium tests.
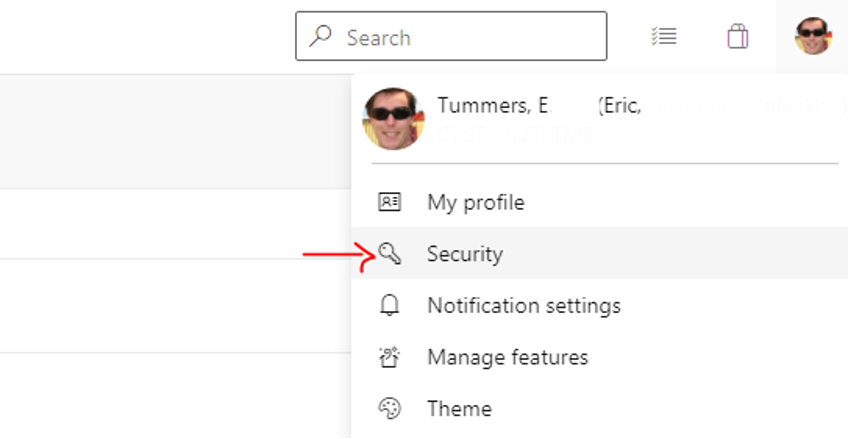
- Get a personal access token (PAT) from Azure Devops Server. You can find this by clicking on your avatar and going into Security. There you can choose Personal access tokens and “New Token”. Make sure to give Full access – you can remove the PAT after you’ve registered the agent.
- In Azure Devops Server go to Collection settings > Pipelines > Agent pools. Here you click “Add pool” to create a new agent pool for you selenium agent. Give it the name of your team.
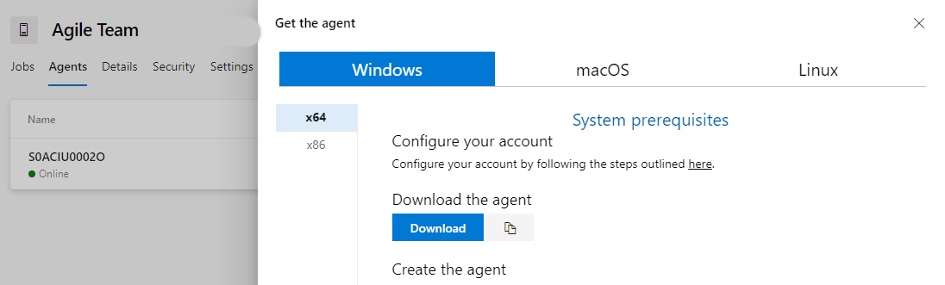
- Open the new created agent pool and go to tab Agents. Click “New agent” and download the Agent (=zip containing the software)
- Now remote desktop to the machine you plan to use as the agent to run your selenium tests.
- Unzip the downloaded agent – we use the D drive and tfsagent folder
- Start a powershell with administrative rights and run the config.cmd in the D:\tfsagent folder
- Provide the details for you environment – we started with NETWORK SERVICE as the account to run the agent (and the tests) and changed it after the installation via the services feature in Windows

- The team agent pool in Azure Devops Server now contains the machine as an agent. Edit the capabilities and add “vstest” to the user-defined capabilities – this is needed to run the unittests that drive our selenium tests
Edit the release pipeline
In the (old) TFS2017 we would use the testagent install task and drive the selenium tests from any release agent. With Azure Devops Server we must run the selenium tests on an agent. That agent is registered in the previous section and now we can edit the release pipeline.
- Add another agent job to your release and select the newly create team agent pool
- Add the Visual Studio Test Platform Installer task – this will install the tools needed to run the unittests*
- Add the Visual Studio Test task – this will run the unittests driving the selenium tests and publish the results*
- for Test Platform Version use the “installed by Tools Installer”
*for details see the references
Save the release pipeline and run it. You should see a price cub and a hooray message 😉
